This workshop included a two-day lofting session. "Lofting" is the process by which the plans for a boat are drawn out full size to resolve discrepancies between the different views, and to correct errors caused by the small scale of the original drawing. Unless the boat is lofted there is no certainty about the shape that will be built, and the boat may be visibly unfair as a result.

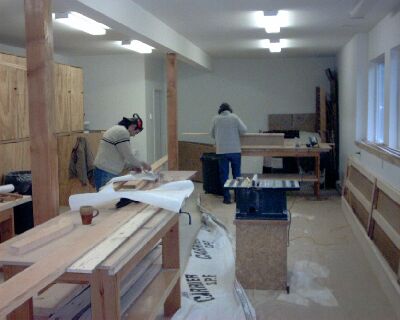
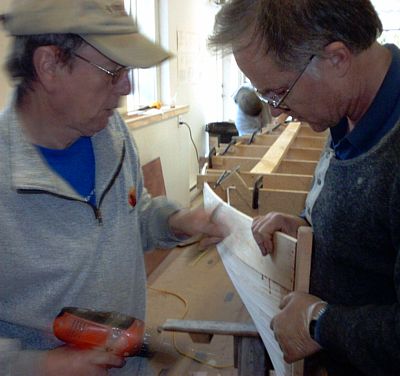
The lofting process produces reliable and accurate patterns for permanent components such as the stems, and for the temporary molds that will be used to control the shape of the planking during construction. Bevels for the angled edges of components are also easily obtained from the lofting. Here, Ben and Owen are laying out backbone parts on the lumber using paper patterns traced from the lofting board.
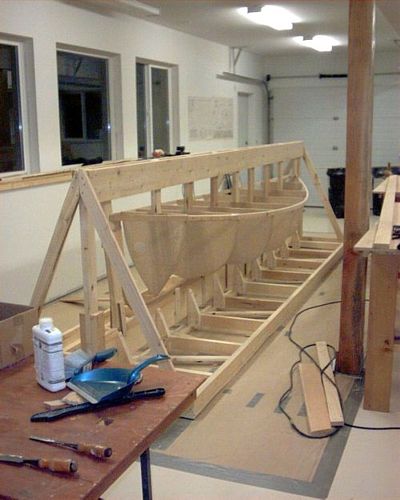
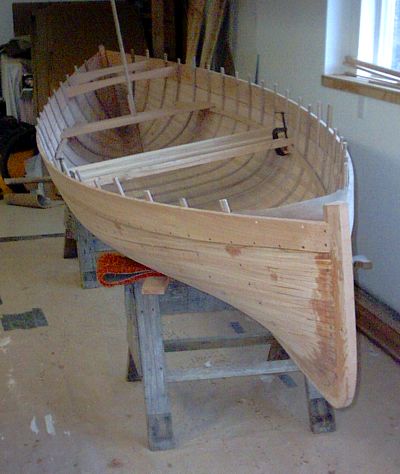
These are the temporary molds around which the planks will be bent. They will be removed when planking is complete, just before the ribs are hot-bent into place. Note the orientation marks on the molds - these are necessary to accurately set them up in the jig.

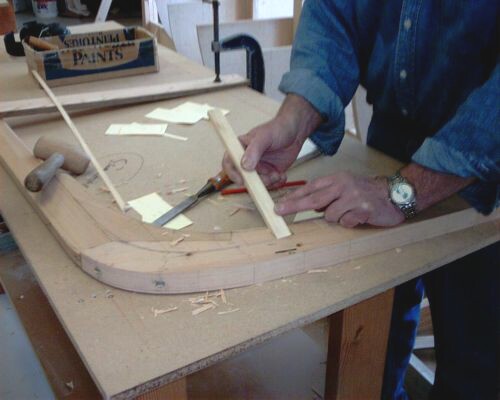
Here are the stem components, cut and fitted and ready to fasten together and to the keel. They too are covered with orientation marks, and also have the rabbet lines clearly drawn on them. It is important to also mark out for the bolts and screws that hold them together - if these are just put in any old place you can get into a lot of trouble later.
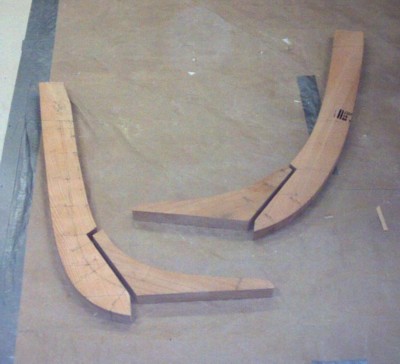
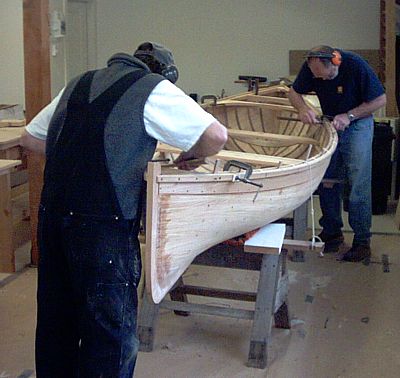
The stems are being carefully aligned so that all the orientation marks and bolt-lines match accurately. Then they are clamped so they cannot shift, drilled and countersunk for the bolts, separated again to be glued, and finally reassembled and bolted.
(This photo is in black & white because I accidentally set the digital camera's date for 1952, long before there was such a thing as colour TV)
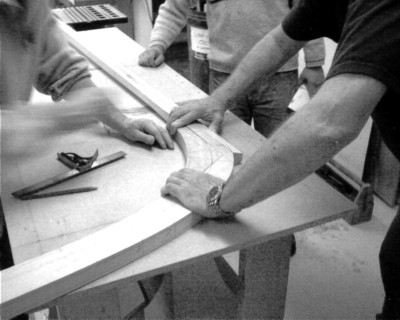
Back to the future.
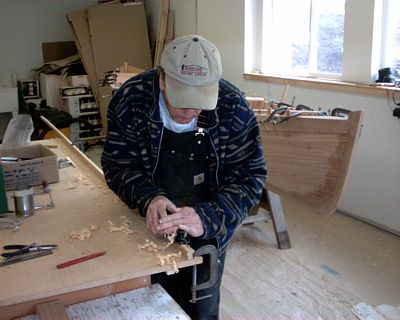
Here, Owen is cutting the rabbet for the sternpost. The outer and inner rabbet lines are always easy to see, but the apex line soon disappears since it is marked on wood that is cut away.
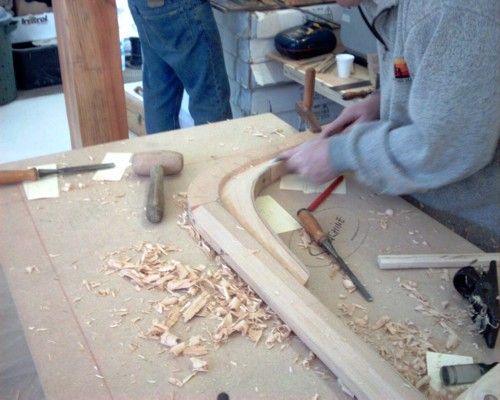
The position of the vanished apex line is therefore determined by trial fitting a chunk of dummy plank to the rabbet repeatedly as work proceeds. If carefully done this gives perfect results. If not carefully done, well, what can you expect?
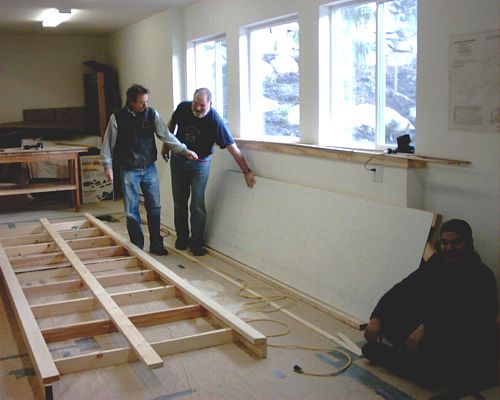
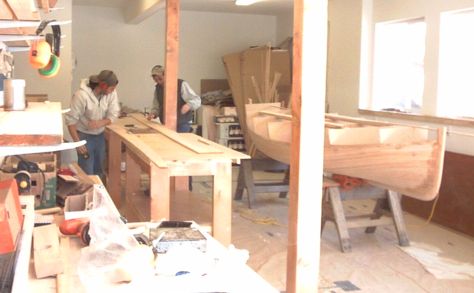
We are supposed to be setting up the jig, but we appear to have gotten side-tracked into another discussion of the finer points of lofting. The upside-down jig base is at left and the full-size lofting board is at right. Too bad the drawing doesn't show up well in this photo.
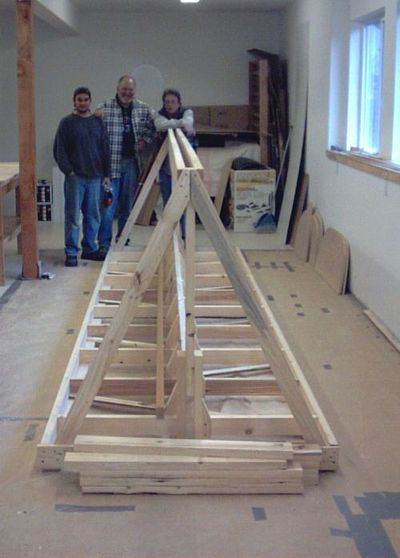
Ben, Ryan, and Owen take a break after completing the jig. This skookum structure was necessary because we could not brace to the overhead in this shop, as is usual for right-side-up building. Note that although building by this method upside-down might seem easier on paper, it isn't in life. We drove about 3000 galvanised finishing nails into the thin edges of the 7/16" planks. This is not too bad when you are looking down on the nail, but if you build upside-down you are on the floor, blinded by ceiling lights and sawdust, with glue dripping on you, banging upwards at the elusive nails. That, my friend, is no fun at all.
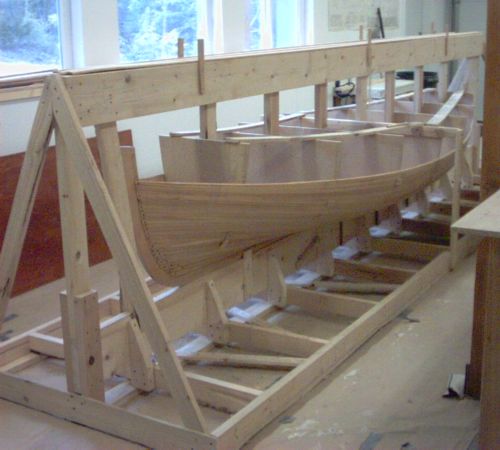
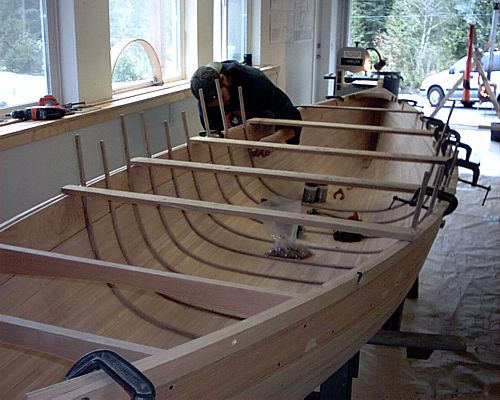
The backbone assembly has been mounted to the jig and cleated securely to it. The molds have been fastened on top of the keel and plumbed and trued. A rough batten has been sprung and fastened around the sheer to prevent the molds from sashaying as we grunt the planks into position. The center mold will also be braced down to the jig base. This middle brace will require shifting out of the way and replacing once or twice to clear the planking.
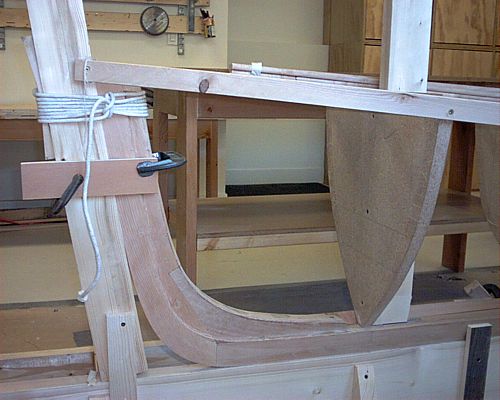
The Sternpost is lashed tightly to the jig, and cleats are clamped firmly on either side to hold alignment. The sheer ribbands also help to restrain the stems. The lashings and cleats are easy to move later when the planking reaches these points.
This is the Stem, which is treated exactly the same as the sternpost. The first two plank strips have been fitted and fastened and are securely clamped at the ends till the glue dries. The twist in these first strips is severe - they rotate nearly 90 degrees in only 3½ feet.
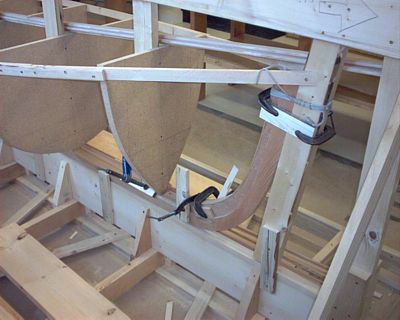
Up to the point shown here, the planking is fairly difficult because there is a lot of twist, the hollow edges are fragile, and the narrow strips give little secure grip even with the special home-made strip-clamps that provide some leverage and purchase (not shown). After this it gets easier.
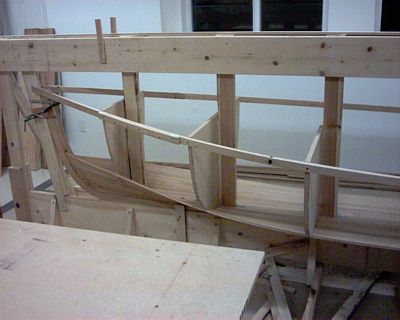
The upper strips, through the turn of the bilge and all the way to the sheerstrake, are easy because there is not much twist and they will lay right into place. Note that the sheer strips have been removed and replaced with other bracing - as the sheer was approached, the bracing strips got in the way of our hammer swing.
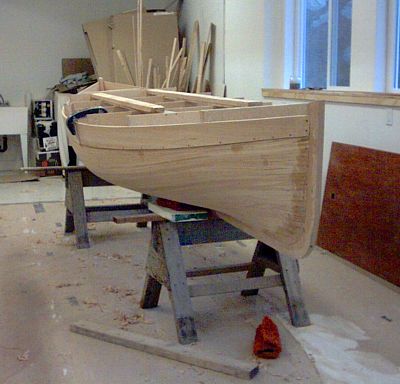
The hull has been removed from the jig and taken outside while we sweep all the chunks of wood and fallen nails out of the shop. Along the sheer you can see small cleats that prevent the molds from just popping out of the hull. The top strip appears lighter because it is bevelled for a dory lap, and that bevel is catching the light. This dory-lap makes the connection between the strip-planked lower hull and the solid cedar sheer-strake.
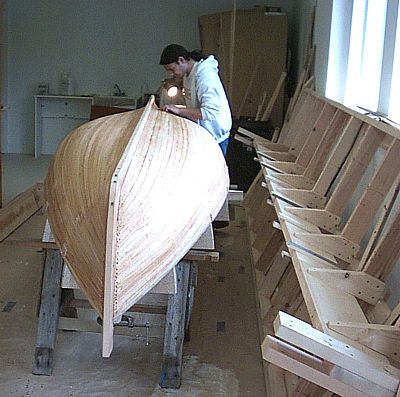
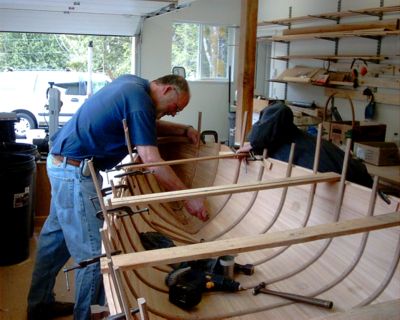
Ben is filling small gaps and correcting edge-nails that poked out through the hull. The jig is no longer needed and is being dismantled. The hull will be planed and sanded fair in the next step.
All smoothed up on the outside, the molds are temporarily removed so we can fair and sand the inside. You can see the molds unit sitting behind the boat. The hull needs careful bracing and support during the inside grinding, since it is still fairly flexible.
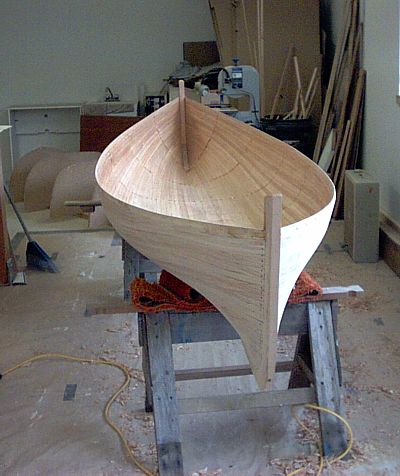
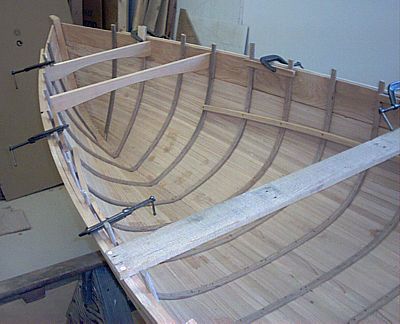
Completely smoothed inside and out, ready for installing the sheerstrake and ribs. The mold unit will be replaced in the hull to support it while bending on the sheerstrakes, and to control the shape of those sheerstrakes as they are pushed into place. All of the planking on this boat, including the sheerstrake, is put on cold. Only the ribs and coaming are hot-bent.
Here Owen is transferring the spiling marks from a plywood spiling batten to a cedar plank that will be a sheerstrake. "Spiling" allows the builder to get an exact fit for a joint in a three-dimensional structure that would be wasteful of both time and material to fit by trial-and-error.
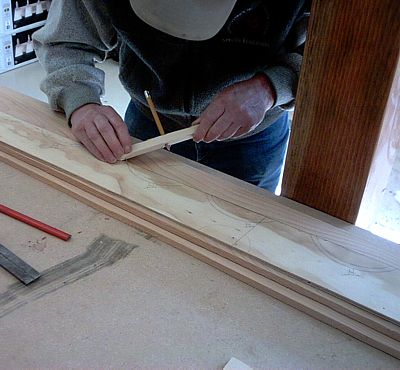
The marks that were transferred to the cedar strake are connected with a batten to obtain a fair line for cutting. Boy, that post was annoying. Probably not as annoying as a mast in the middle of a twin berth.
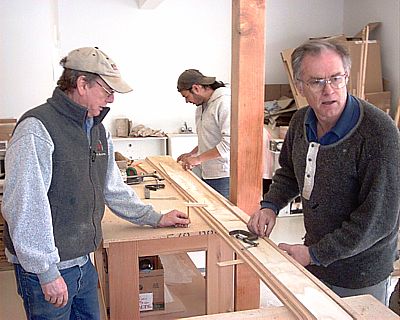
Ben and Owen have each got a sheerstrake cut to the spiled shape, and are now planing the bevel along the edge for the dory-lap connection to the rest of the hull. The molds are back in place.
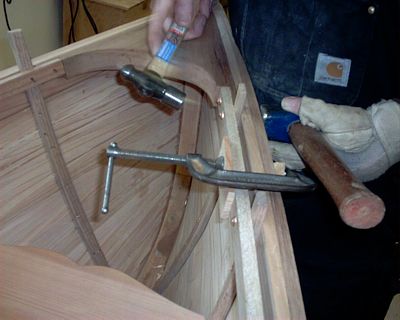
So, well, we've pushed the thing into place and it fits, so why not fasten her down? Ya see all the cute little L-shaped clamps that help us hold it in place? Ben and Ryan (outta sight) are doing the other plank-to-stem joint while Owen and I do this one. The dory lap has been clenched-nailed all along already, skipping the places where the ribs will be. When the ribs are put in their fastenings will go right through the laps and kill two birds.
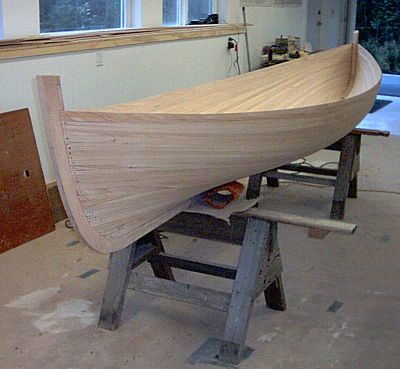
The sheerstrakes are on. The planking is done. The hull is now a complete shell that would float if you tried it, but it needs bracing and ergonomic necessities like thwarts.
Don't relax yet!!
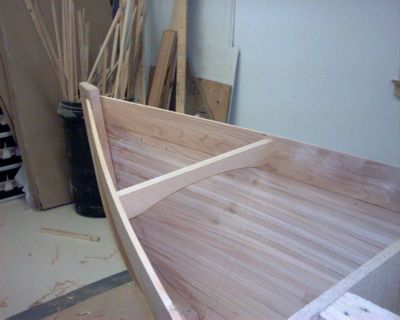
You can still see the molds in place here, but with this deck beam and the stern hook in place, plus a mess of cross-bracing at the sheer, the hull will be rigid enough to retain its shape as the ribs are being bent into the inside. This is the last we will see of those molds.
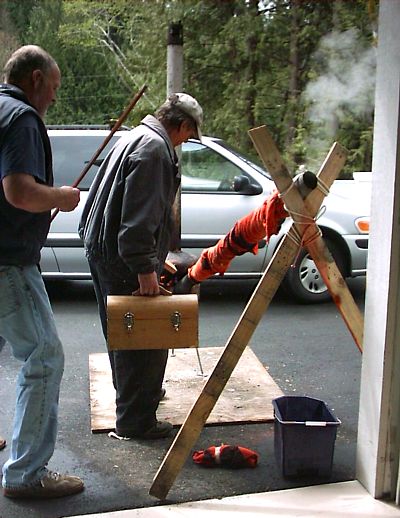
All the scrap wood from the boat was burned to generate steam for bending the ribs. Owen is feeding scrap wood to our buckshee steam generator and clutching his lunch-pail in preparation for feeding himself (This work gives you an appetite). Steam is issuing forth freely from the mouth of the gutter-pipe steam-chamber. Ryan has a rib in hand, and is going to shove it in the pipe this minute. The raggedy orange stuff that looks so much like a torn-up cheap wool blanket from the thrift store is actually "thermal insulation".
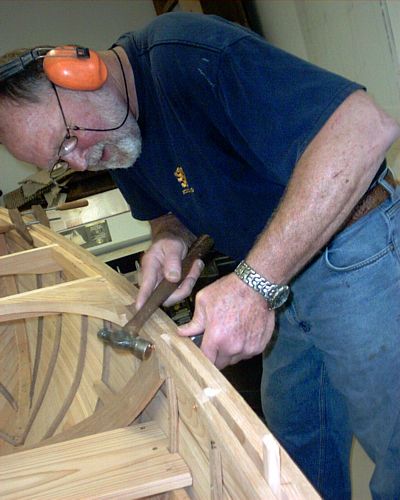
Half of the ribs are already in, and the steamer in the background is still hungrily eating wood and belching clouds. See the bracing and temporary gun'l that stops the ribs from spreading the hull? Ben is driving a nail from outside the hull, thru the rib, and clenching it solo, which is possible at that location. Most of the clench-nails require that two people cooperate.
Two people cooperate: Owen is drilling for and driving the clench-nails, Ryan is turning the points over and back into the ribs as they come through, and then bucking with a heavy iron as Owen drives the heads flush. I always like to listen to the steady rhythm of calls and strikes that a well-tuned team gets into after a bit of practice.

The same operation from the other side. We used several bucking irons of different shapes and weights for different positions and situations. The heaviest was four pounds, the lightest one pound.
All the ribs are in and clenched through the planking. They are still free at the tips, and will be until the gunwales are installed. We have weaseled the seat risers in under the bracing and fastened them to the ribs with screws.
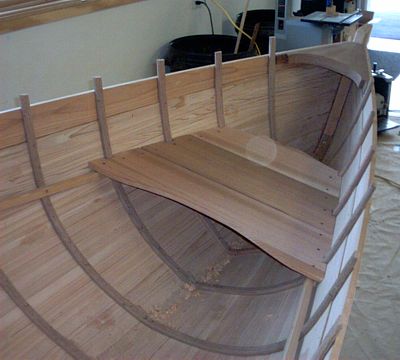
Thwarts are going in now, sternsheets shown here. One of the reasons that a builder consistently thinks of thwarts as 'thwarts' instead of merely 'seats' is that they are an essential structural cross-member, not just a place to park the crew's butts. Note the notches in the sternhook to receive the inwales, and that the sternsheets are notched over the ribs. Notching them over so the ends are a tight fit to the planking increases strength and rigidity significantly.
All the thwarts are now in place, so the sheer bracing could be removed without the hull changing shape. Somebody has stuck a stick in the mast position to aid their imagination..(Our baggy sails before the breeze, rollin' down to old Maui.) The rib-ends still stand proud and will not be trimmed till the gunwales are in.
Owen is tapering the gunwales, both in depth and thickness. This small touch has no structural significance, but much improves the looks. It sometimes makes the wales a little easier to bend and fit at the tips, but not on this boat - the sheer is so mild that the gunwales were already extremely easy to install.
Ryan and Owen have got the inwales and outwales in position with alternate rivets in place all along. A few clamps are still on, but the tips have already been screwed home to the stems and sternhook, so there is no tendency for the wales to spring off. As each framehead is rivetted home, the frame end above it will be cut off. Cutting the framehead after drilling and rivetting decreases the chance of splitting. After alternate rivets are done, the ones between will be completed.
Ryan is rivetting over the head of the copper nail where it comes through the rove. The rivetted end is like having a head on both ends of the nail, so rivets are extremely tenacious fastenings. Rivetted structures will maintain their integrity even under severe stress and flex. Visible also are the curved chocks that support the deck coaming and strengthen the hull, and the fitted thwart-end notched over the rib to meet the planking. Note the fillers in the inwale, which is also notched down to form a solid shelf for the deck which will soon go in.
Owen is doing the same thing at the other end. At the tips of the inwales, the last rib fits up tight against the ends of the sternhook. One rivet goes through the rib and another goes through the sternhook tip. The visible square corner of the sternhook below the inwale will be faired off later.
OK, the mast step is in place, the rowlock chocks are on, thwart knees are installed, and the chocks for the stringseat are shaped and fastened to the main thwart. Note the fillers in the rail at the knees. The deck has been laid from alternating old-growth and second-growth cedar planks, and the mahogany coaming has been bent, fitted, notched, bevelled, and is waiting to be installed once the deck-edge is trimmed.
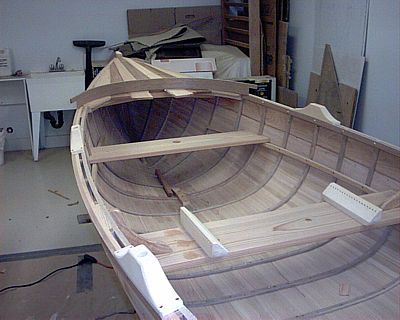
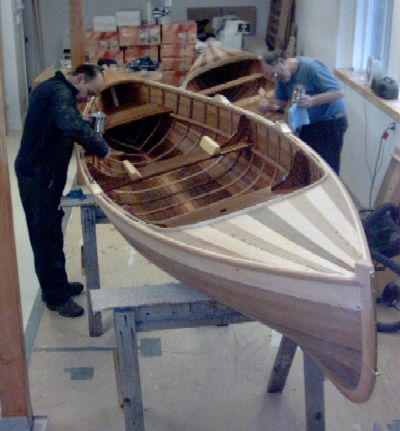
Whole view of the boat before trimming the deck and installing the coaming. We also built floorboards, installed the brass keel band, and fitted tow-rings on the ends before the workshop ended.
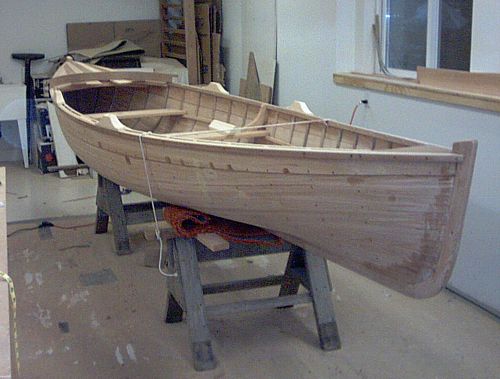
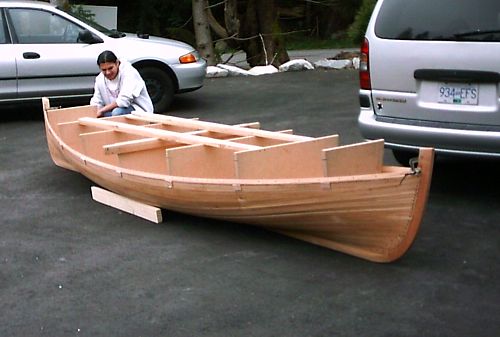
Ryan bought the bare boat (rear) after the workshop and painted and varnished it himself. Here he and another owner are finishing up their boats. The other boat (front) is built to the same design.