Larry
Westlake
WESTLAKE BOATS
This
page was posted in response to a question on the WOODEN
CANOE HERITAGE ASSOCIATION website.
If you did not come here from there, please check out their
discussion forums at WCHA
1987 glued-strip canoe – scantlings
& construction notes.
I don't recommend doing
it exactly the way we did it. But here is how we did it...
- We used molds for David Hazen's smaller "Micmac"
model, right out of his book "Stripper's Guide". I
shortened the boat to 12 feet by altering the station spacing
proportionately. Note that those patterns are not fair!
That was corrected after mold setup by using sighting
battens, glued-on shims for low spots, and removal of high spots.
- A glue-laminated ¾ x 1 Dfir inner stem was used, with a ¾
glue-laminated mahogany outer applied later. Dfir outer keel 1x¾ pent
section. No keelson.
- We used square-edged 3/16" thick strips (no beading). Where
section
curvature would produce an unacceptable joint gap, edges were bevelled
by hand. Any gap less than a 32nd will be
invisible among the woodgrain, but the UF glue will fill up to 1/8th.
Hand bevelling is easy to do accurately enough, wastes far
less
wood & time than beading, is clean, quiet, and enjoyable.
"See-through-crax" that some strippists complain about with Sq-edge
strips is not a problem when using UF, since it is densely opaque.
Nuttin to fear but fear itself. Widths of planks varied – ¾ around
bilge, increasing to up to 1-1/2 in flat areas.
- Stapled the strips in place. We started with a level strip,
then
worked up and down from there. This approach forces excessive edge-set
into the bottom "football" strips, and I now think that horizontal
strips in the topsides look gross. Starting at the sheer and working
toward the keel is better in every way except one – all strips must be
narrow enough to bend, so you can't use wide ones to quickly fill easy
areas. Okay, two: if your sheer line is not sweet,
paralleling it
with the strips will make that painfully and permanently obvious.
- Mix the UF glue powder thick enough so it won't sag out of
the
joints and don't smeerp it around. It's easy to clean up if its in nice
squeeze-out beads, not if its a surface glaze. Using a squeeze-bottle
to apply it is easiest, but only mix enough for two strips at a time or
it'll kick off. If possible, come back to the seams after a
few
hours, when the glue has gelled to leather-stiff but is not yet
glass-hard (as it will be next day). At this gel stage you
can
just scrape it off perfectly cleanly. If you leave it to sand
later, expecially where it has glazed the surface, it is much more work.
- Once all the strips are laid up and the glue has cured,
hot-swab
all the staple-holes, smooth the hull outside, remove the molds, and
smooth and finish-sand the hull inside – inside must be in
ready-to-varnish state, since you can't sand it after the ribs go in.
- Ribs are 3 inches apart, ¼ x ¾ red cedar, edges chamfered.
Were I
to do it again, I would use something stronger, though not a single one
has broken.
- We boiled the ribs in a gutter pipe with the end folded
over, then
hammered flat and rolled and hammered again, so it finishes up like an
old-style toothpaste or ointment tube. Doesn't leak a drop if done
carefully. The bottom end of the tube sat on a camp stove burner.
It was secured so it could not spill - that much boiling
water
can be deadly. Boiling is way faster than steaming. The main
problem was over-cooking the next rib while getting the current one
into the boat.
- My memory fails me here, but I think we quickly pre-bent
and
over-bent the hot ribs over our knees by eye, and then kind of rolled
them out to lay firmly to the bilges and tumblehome. We clamped them at
the rails, and popped in a light crossbar sprung to hold the ribs
against the sides, with pads on the ends. Having ten hands was – well,
handy. The number of clamps was a big problem but I can't remember how
we solved that. We might have made wooden clamps, we might have stapled
the ribs in a few places.
- Once the ribs were dry, we took them out, sanded the raised
grain,
and glued them back in place with UF after masking their runs, stapling
them till the glue dried. The staple-wounds on the inside of ribs won't
clean up or swell out the way those on the outside of the hull will,
and are the ugliest item on the boat. This system does not allow the
planking to move against the rib as the girth expands &
contracts
with moisture, so eventually caused some of the ribs to pop locally –
very slightly - from the planking, or, if this didn't occur, some of
the plank to split (not usually at the seams, but in the middle). It is
the greatest fault with what we did – because of the negative cosmetic
legacy of the staples, and the inflexible connection to the planking. A
better system would be to clench the ribs with canoe tacks so they
could adjust themselves to suit expansion stresses, instead of gluing
them. It would look far better and take less time, too, since you could
clench while hot and have no clean-up to do.
- Two half-ribs were used on the bottom between ribs. One
would have been enough, maybe saved a half-pound and lots of work.
- Inwale was very slim – 3/4 deep x 3/8 thick Dfir. Outwale
3/4 deep
x 5/8 thick Dfir, screwed from inside thru in'l, plank, &
ribheads.
- Seat frames were 3/4 x 1¼ Dfir on edge, seat fabric was
laced over
them, not through holes so as not to weaken. Screwed atop riser instead
of hung from inwales.
- A 5/8 x 3/4 continuous seat riser about 6 ft long was used,
fastened thru the plank & ribs from outside. This was dumb – we
probably gained two unnecessary pounds with this. Should have used
short cleat risers – or a thicker inwale to hang the seats from as
usual – or flat hanger straps instead of hanger bolts through the
inwale. I hate to tell you, but the risers were cut from a chunk of
nice alder that was exactly the size needed. Alder is prone to rot.
Well, 25 years later I am still worrying – is it going to rot before I
do, or not? So far, not, and the suspense is killing me.
- Slim natural-crook italian plum breasthooks (instead of
decks) ¾ thick.
- Thwarts were local sour cherry (weighs less than ash, is
nearly as
strong, very supple). Main one was ¾ thick at centre thinning to ½ at
ends, 2½ wide in centre narrowing/necking markedly near ends, arched
about ¼ inch. Others varied in proportion to length.
- #6 screws were used along the rail and riser, at
breasthooks, and for outer stems & keel. #8 were used
in the seats & at thwarts. All other joints glued.
- The only finish was urethane varnish.
- No metal band on stems or keel – too heavy! Too expensive!
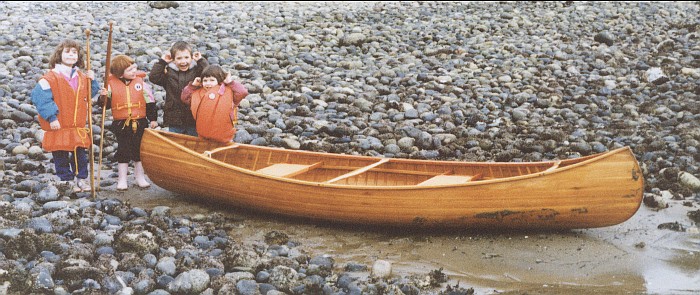
- "We" in this account refers to myself, another dad, and our
three
kids who all built this canoe together. For the most part we worked
with hand tools only. It took 3 months of Sunday afternoons working as
a group, with some other days and evenings where I sawed wood or sanded
alone. Ripping planking and ribs etc. was demonstrated, and the two
older boys did some ripping, but most of the components had been sawn
by me in advance so that our work together was quiet, companionable and
pleasant. We certainly could not have built a snot-stripper this cheap,
this fun, or with this little exposure to toxins and irritants. I think
time was about the same as a conventional glassed stripper, weight too,
but this boat is much more fragile.
Was this article useful?
Let me know... Larry Westlake
WESTLAKE
BOATS